语音转文本(Speech-to-Text)指南
分类: Azure认知服务 ◆ 标签: #Azure #人工智能 #语音服务 #语音转文本 ◆ 发布于: 2023-06-05 16:43:53

我们上一章简单的介绍了Azure语音服务,介绍了语音服务提供了几样工具: Azure Speech CLI, Azure Speech SDK(多种开发语言支持), 语音设备SDK, 以及Speech Stuido, Rest API, 同时Azure语音服务也提供了几种场景,我们本机以一个实例来描述Azure语音服务中的语音转文本的开发的基本要点。本节的源代码可以从下述的位置找到: Demo Code
使用.Net SDK 快速入门语音转文本
我们前面讨论过了,Azure语音服务提供Azure Speech Cli以及各种语言工具的SDK, 我们需要注意到各种工具的具体应用场景,如果是需要更多的定制,客户自身也有足够的coding 能力,那么选择SDK是合适的选择, 下面我们使用.Net 5 SDK来完成整个指南。
创建新的项目
使用如下的命令创建新项目:
dotnet new console -n SpeechToText
cd SpeechToText
dotnet add package Microsoft.CognitiveServices.Speech
上述命令再目录SpeechToText中创建了项目,同时进入到该项目目录中添加speech的包支持。完成这个部分之后,使用编辑器或者IDE打开该项目,添加如下的包引用到文件Program.cs中:
using System;
using System.IO;
using System.Threading.Tasks;
using Microsoft.CognitiveServices.Speech;
using Microsoft.CognitiveServices.Speech.Audio;
SpeechConfig对象
我们先来认识一下SpeechConfig对象,这个对象是所有语音服务必须使用的配置对象,无论是开发语音识别服务,还是语音合成服务,还是语音翻译服务,都是必须首先创建一个SpeechConfig对象,创建该对象的方法也很简单,只需要传入key和region即服务所在的区域。
在Main方法里创建SpeechConfig对象。
async static Task Main(string[] args)
{
    var speechConfig = SpeechConfig.FromSubscription("<paste-your-subscription-key>", "<paste-your-region>");
}
从麦克风中识别文本
进行语音识别时,除了要传入SpeechConfig对象,同时也要传入AudioConfig, 我们在本例中是为了从麦克风中进行识别,那么可以使用如下的代码:
async static Task FromMic(SpeechConfig speechConfig)
{
    using var audioConfig = AudioConfig.FromDefaultMicrophoneInput();
    using var recognizer = new SpeechRecognizer(speechConfig, audioConfig);

    Console.WriteLine("请对着麦克风讲话:");
    var result = await recognizer.RecognizeOnceAsync();
    Console.WriteLine($"文本识别为: Text={result.Text}");
}
定义了方法FromMic之后,我们对Main方法进行更改:
async static Task Main(string[] args)
{
    var speechConfig = SpeechConfig.FromSubscription("<paste-your-subscription-key>", "<paste-your-region>");
    await FromMic(speechConfig);
}
从上述方法FromMic就可以看出,为了识别麦克风,我们使用了AudioConfig 类的方法FromDefaultMicrophoneInput() 代表从默认的麦克风读入
更改完成之后,运行dotnet run 运行该项目,该项目效果如下:
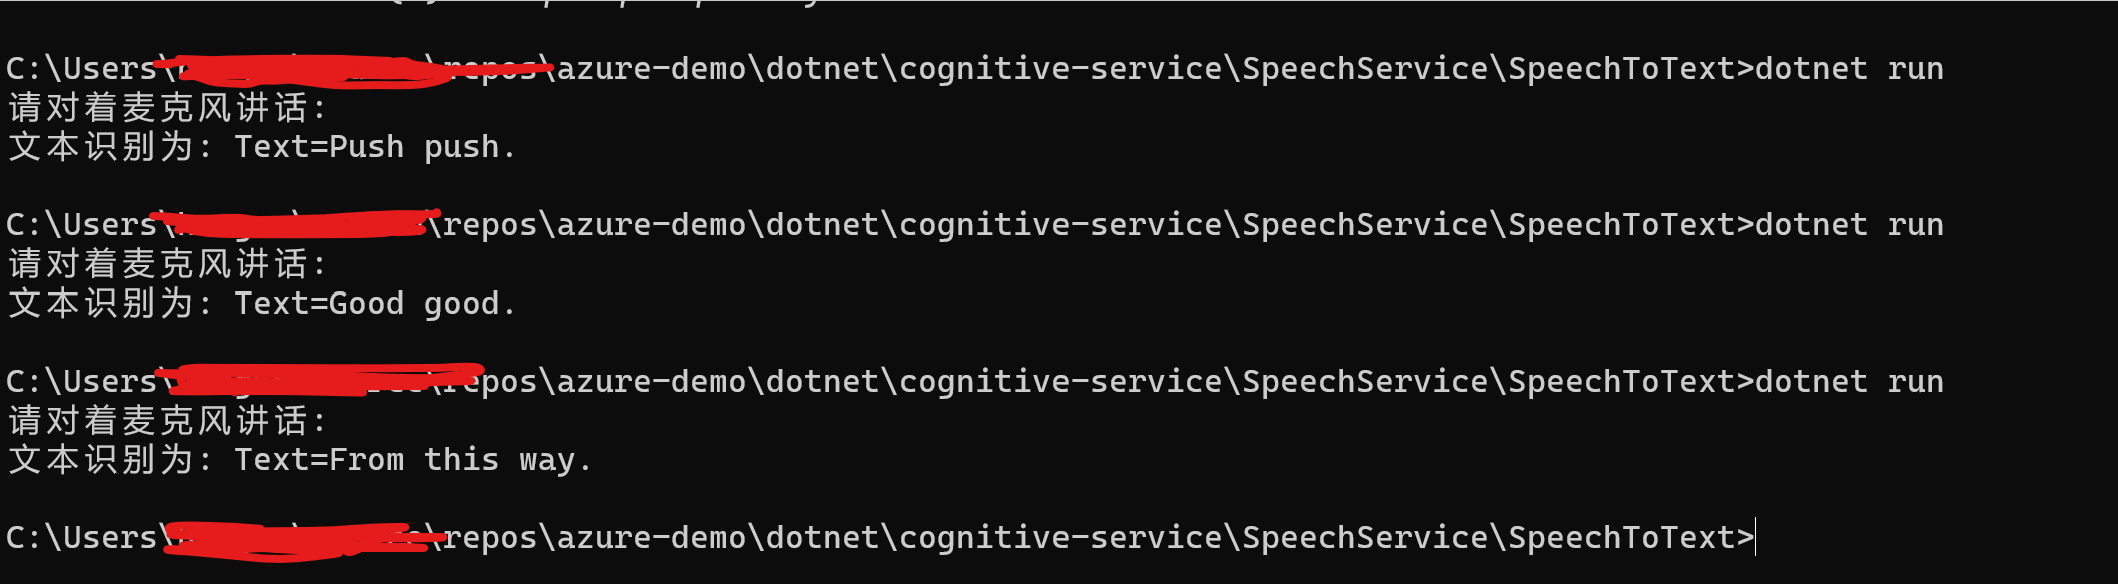
识别其他语言
我们会发现只能识别英文,假如我们需要识别其他的语言,该如何做呢?例如我们需要识别中文?
speechConfig.SpeechRecognitionLanguage = "zh-CN"
所以还是去设置SpeechConfig对象的属性SpeechRecognitionLanguage, 关于语言的可选择项,可以参考文档:语音转文本支持的语言
那么我们更改Main方法如下:
async static Task Main(string[] args)
{
    var speechConfig = SpeechConfig.FromSubscription("", "");
    speechConfig.SpeechRecognitionLanguage = "zh-CN";
    await FromMic(speechConfig);
}
这次运行就可以识别中文了,如下图:

从文件中识别
为了测试我们这一步,需要创建一个wav格式的声音文件,需要注意的是默认情况下,Speech语音服务仅仅支持16 KHz 或 8 kHz,16 位,单声道 PCM的文件,为了创建这样一个文件,可以使用我们上一章提供的Speech Cli工具来另存一个wav文件,例如:
spx synthesize --text "通过Azure语音服务CLI,测试Azure语音服务的文本转语音" --audio output my-sample.wav --voice zh-CN-XiaoxiaoNeural
这样我们就可以得到一个符合需求的wav格式文件了,具体使用方法,请参考该文档Speech Cli Intro
现在我们已经有了一个用于测试的wav文件了,那么我们来定义如下的方法FromFile
async static Task FromFile(SpeechConfig speechConfig)
{
    using var audioConfig = AudioConfig.FromWavFileInput("my-sample.wav");
    using var recognizer = new SpeechRecognizer(speechConfig, audioConfig);

    var result = await recognizer.RecognizeOnceAsync();
    Console.WriteLine($"文本识别为: Text={result.Text}");
}
从wav文件中读取内容,仅仅只需要使用AudioConfig.FromWavFileInput()方法就可以了。
更改Main方法如下:
async static Task Main(string[] args)
{
    var speechConfig = SpeechConfig.FromSubscription("", "");
    speechConfig.SpeechRecognitionLanguage = "zh-CN";
    //await FromMic(speechConfig);
    await FromFile(speechConfig);
}
然后运行dotnet run即可以完成了
从内存流中输入解析
假如你已经有一个音频文件已经通过byte[]数组读入到了内存里,那么我们可以通过类PushAudioInputStream进行读取,并且使用Speech语音服务进行识别,我们在本例中为了方便演示,我们使用File将声音文件读入到内存中,然后进行识别:
async static Task FromStream(SpeechConfig speechConfig)
{
    var reader = new BinaryReader(File.OpenRead("my-sample.wav"));
    using var audioInputStream = AudioInputStream.CreatePushStream();
    using var audioConfig = AudioConfig.FromStreamInput(audioInputStream);
    using var recognizer = new SpeechRecognizer(speechConfig, audioConfig);

    byte[] readBytes;
    do
    {
        readBytes = reader.ReadBytes(1024);
        audioInputStream.Write(readBytes, readBytes.Length);
    } while (readBytes.Length > 0);

    var result = await recognizer.RecognizeOnceAsync();
    Console.WriteLine($"文本识别: Text={result.Text}");
}
注意类方法AudioConfig.FromStreamInput()默认读取文件的格式为16 KHz 或 8 kHz,16 位,单声道 PCM的文件, 如果文件格式和这个不同,那么可以使用方法AudioStreamFormat.GetWaveFormatPCM(sampleRate, (byte)bitRate, (byte)channels) 然后将AudioStreamFormat对象传递给`CreatePushStream(), 即可以读取了。
然后接下来只需要更改Main函数就可以了:
async static Task Main(string[] args)
{
    var speechConfig = SpeechConfig.FromSubscription("7038e65654ff4042be18b04522629a99", "chinaeast2");
    speechConfig.SpeechRecognitionLanguage = "zh-CN";
    //await FromMic(speechConfig);
    //await FromFile(speechConfig);
    await FromStream(speechConfig);
}
连续语音识别
我们前面的例子中,每次的语音识别都是以一句表达的语句进行识别,这句表达语句结束了之后,就会立即停止识别。这里有一个概念:什么是一句表达语句,我的理解就是例如在我们日常的说话中,说完一句话,或者是文字表达中的以标点符号结尾,或者有停顿的地方都可以称之为一句表达语句,需要注意的是在语音识别中,除了一个表达语句,还有一个硬性的要求,那就是不得超过15秒。但是很多时候,我们一个文件中有很多表达语句,又或者你通过麦克风进行识别时,你说一直保持说话,也是需要持续识别的,持续识别的要点在于需要订阅不同的事件:
- 事件: Recognizing, 表示正在识别。
- 事件:Recognized, 识别结束
- 事件: Canceled, 取消识别
- 事件:SessionStopped, 语音服务的会话结束。
在监听相应的事件之后,我们需要通过方法``StartContinuousRecognitionAsync启动连续识别,然后通过StopContinuousRecognitionAsync()`停止连续识别。
主要的代码如下:
async static Task FromContinue(SpeechConfig speechConfig)
{
    using var audioConfig = AudioConfig.FromDefaultMicrophoneInput();
    using var recognizer = new SpeechRecognizer(speechConfig, audioConfig);

    //创建认证状态
    var stopRecognition = new TaskCompletionSource<int>();


    //订阅事件
    recognizer.Recognizing += (s, e) =>
    {
        Console.WriteLine($"正在识别: Text={e.Result.Text}");
    };

    recognizer.Recognized += (s, e) =>
    {
        if (e.Result.Reason == ResultReason.RecognizedSpeech)
        {
            Console.WriteLine($"识别结束: Text={e.Result.Text}");
        }
        else if (e.Result.Reason == ResultReason.NoMatch)
        {
            Console.WriteLine($"NOMATCH: Speech could not be recognized.");
        }
    };

    recognizer.Canceled += (s, e) =>
    {
        Console.WriteLine($"CANCELED: Reason={e.Reason}");

        if (e.Reason == CancellationReason.Error)
        {
            Console.WriteLine($"CANCELED: ErrorCode={e.ErrorCode}");
            Console.WriteLine($"CANCELED: ErrorDetails={e.ErrorDetails}");
            Console.WriteLine($"CANCELED: Did you update the subscription info?");
        }

        stopRecognition.TrySetResult(0);
    };

    recognizer.SessionStopped += (s, e) =>
    {
        Console.WriteLine("\n    Session stopped event.");
        stopRecognition.TrySetResult(0);
    };

    await recognizer.StartContinuousRecognitionAsync();

    //等待结束
    Task.WaitAny(new[] { stopRecognition.Task });

    // make the following call at some point to stop recognition.
    //停止识别
    await recognizer.StopContinuousRecognitionAsync();

}
然后更改Main函数
await FromContinue(speechConfig);
开启听写模式
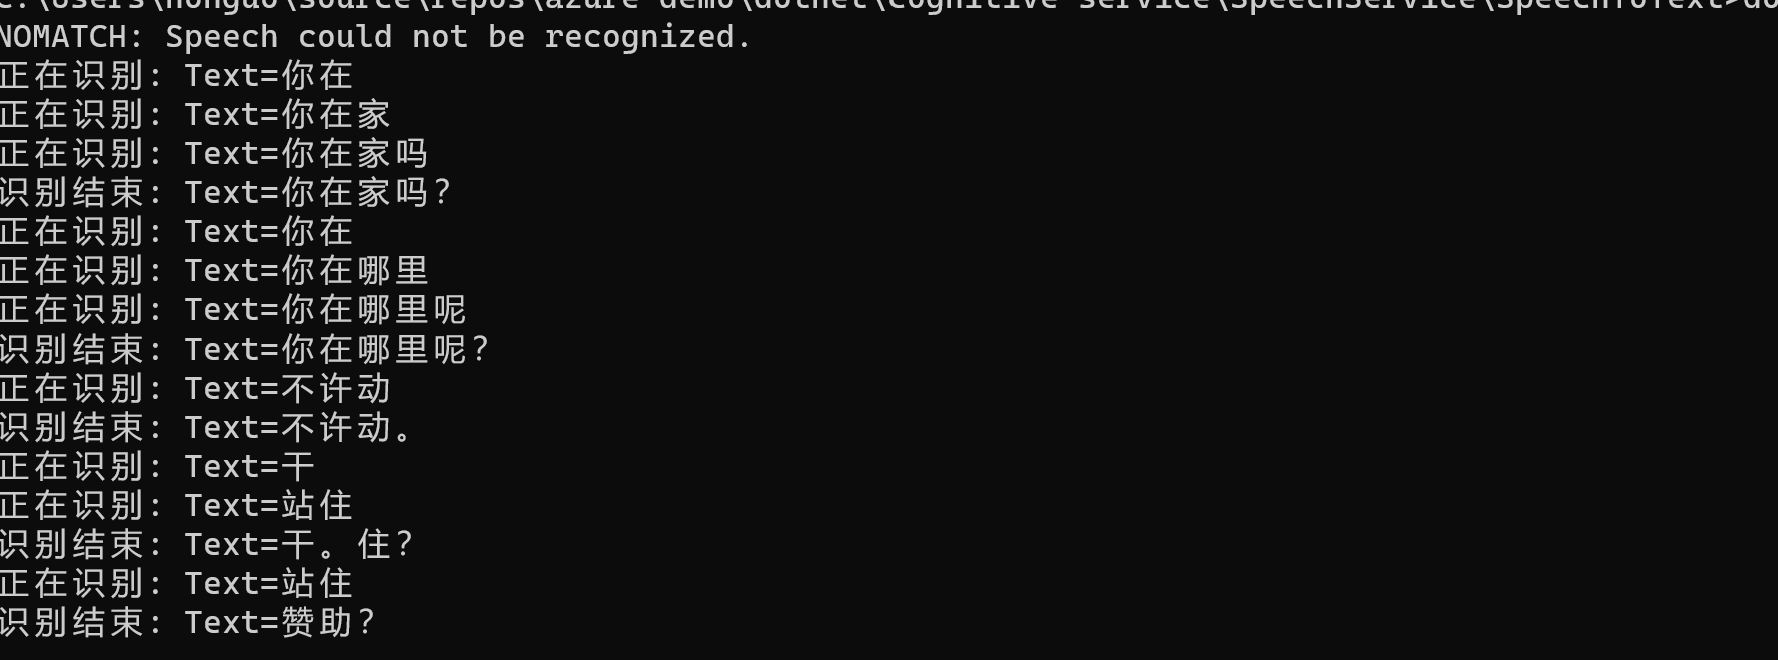
关于听写模式我的理解时会根据语气在转换文本的时候,会将语气形成标点符号,例如:当你问一个人,你在家吗+语气,语音识别的时候会识别成:你在家吗? 要启动听写模式也非常简单,只需要在对象SpeechConfig上启动就可以了,例如:
speechConfig.EnableDictation();
启用了听写模式之后,使用上述的连续识别应用,如下图:注意图中的标点符号,例如句号,问好等等。
错误处理
我们在联系识别中实际已经应用到了,通过识别回来的resource来判断从而达到错误处理的要求,如下述代码:
switch (result.Reason)
{
    case ResultReason.RecognizedSpeech:
        Console.WriteLine($"RECOGNIZED: Text={result.Text}");
        break;
    case ResultReason.NoMatch:
        Console.WriteLine($"NOMATCH: Speech could not be recognized.");
        break;
    case ResultReason.Canceled:
        var cancellation = CancellationDetails.FromResult(result);
        Console.WriteLine($"CANCELED: Reason={cancellation.Reason}");

        if (cancellation.Reason == CancellationReason.Error)
        {
            Console.WriteLine($"CANCELED: ErrorCode={cancellation.ErrorCode}");
            Console.WriteLine($"CANCELED: ErrorDetails={cancellation.ErrorDetails}");
            Console.WriteLine($"CANCELED: Did you update the subscription info?");
        }
        break;
}
通过词组列表提高识别精度
从声音识别然后转换到文本,极有可能会因为多音字,同音字从而造成识别精度不够,例如在英语里: Move to Ward, 容易识别成Move toward, 中文里同音字,多音字就更多了,为了提高识别精度,我们可以通过词组列表提升精度。可以使用如下的代码:
var phraseList = PhraseListGrammar.FromRecognizer(recognizer);
phraseList.AddPhrase("Supercalifragilisticexpialidocious");
词组列表中可以添加单个的单词,也可以添加完整的词组或者短语。还可以使用clear()方法来清除整个列表。
识别其他格式的音频文件
我们前面说过,默认情况仅仅支6 bit, 16khz 单身到 PCM的wav文件,假如我们有其他格式的音频文件该如何识别?这里我们需要使用到一个第三方库:GStreamer, 你可以从这个链接来查看如何在windows上安装GStream, 下载回来gstreamer-1.0-msvc-x86_64-1.18.4.msi之后,一路安装就好了,安装完成之后,需要将他们放在path变量中。
为了测试,我已经将一个flac文件放在目录中。
同时我们需要从PullAudioInputStream来读取该文件,需要注意的时该类需要一个帮助类,该帮助类要继承PullAudioInputStreamCallback 并实现他的方法。
public sealed class BinaryAudioStreamReader : PullAudioInputStreamCallback
{
    private System.IO.BinaryReader _reader;

    /// <summary>
    /// Creates and initializes an instance of BinaryAudioStreamReader.
    /// </summary>
    /// <param name="reader">The underlying stream to read the audio data from. Note: The stream contains the bare sample data, not the container (like wave header data, etc).</param>
    public BinaryAudioStreamReader(System.IO.BinaryReader reader)
    {
        _reader = reader;
    }

    /// <summary>
    /// Creates and initializes an instance of BinaryAudioStreamReader.
    /// </summary>
    /// <param name="stream">The underlying stream to read the audio data from. Note: The stream contains the bare sample data, not the container (like wave header data, etc).</param>
    public BinaryAudioStreamReader(System.IO.Stream stream)
        : this(new System.IO.BinaryReader(stream))
    {
    }

    /// <summary>
    /// Reads binary data from the stream.
    /// </summary>
    /// <param name="dataBuffer">The buffer to fill</param>
    /// <param name="size">The size of data in the buffer.</param>
    /// <returns>The number of bytes filled, or 0 in case the stream hits its end and there is no more data available.
    /// If there is no data immediate available, Read() blocks until the next data becomes available.</returns>
    public override int Read(byte[] dataBuffer, uint size)
    {
        return _reader.Read(dataBuffer, 0, (int)size);
    }

    /// <summary>
    /// This method performs cleanup of resources.
    /// The Boolean parameter <paramref name="disposing"/> indicates whether the method is called from <see cref="IDisposable.Dispose"/> (if <paramref name="disposing"/> is true) or from the finalizer (if <paramref name="disposing"/> is false).
    /// Derived classes should override this method to dispose resource if needed.
    /// </summary>
    /// <param name="disposing">Flag to request disposal.</param>
    protected override void Dispose(bool disposing)
    {
        if (disposed)
        {
            return;
        }

        if (disposing)
        {
            _reader.Dispose();
        }

        disposed = true;
        base.Dispose(disposing);
    }


    private bool disposed = false;
}
然后使用上述的连续识别的方法定义方法:
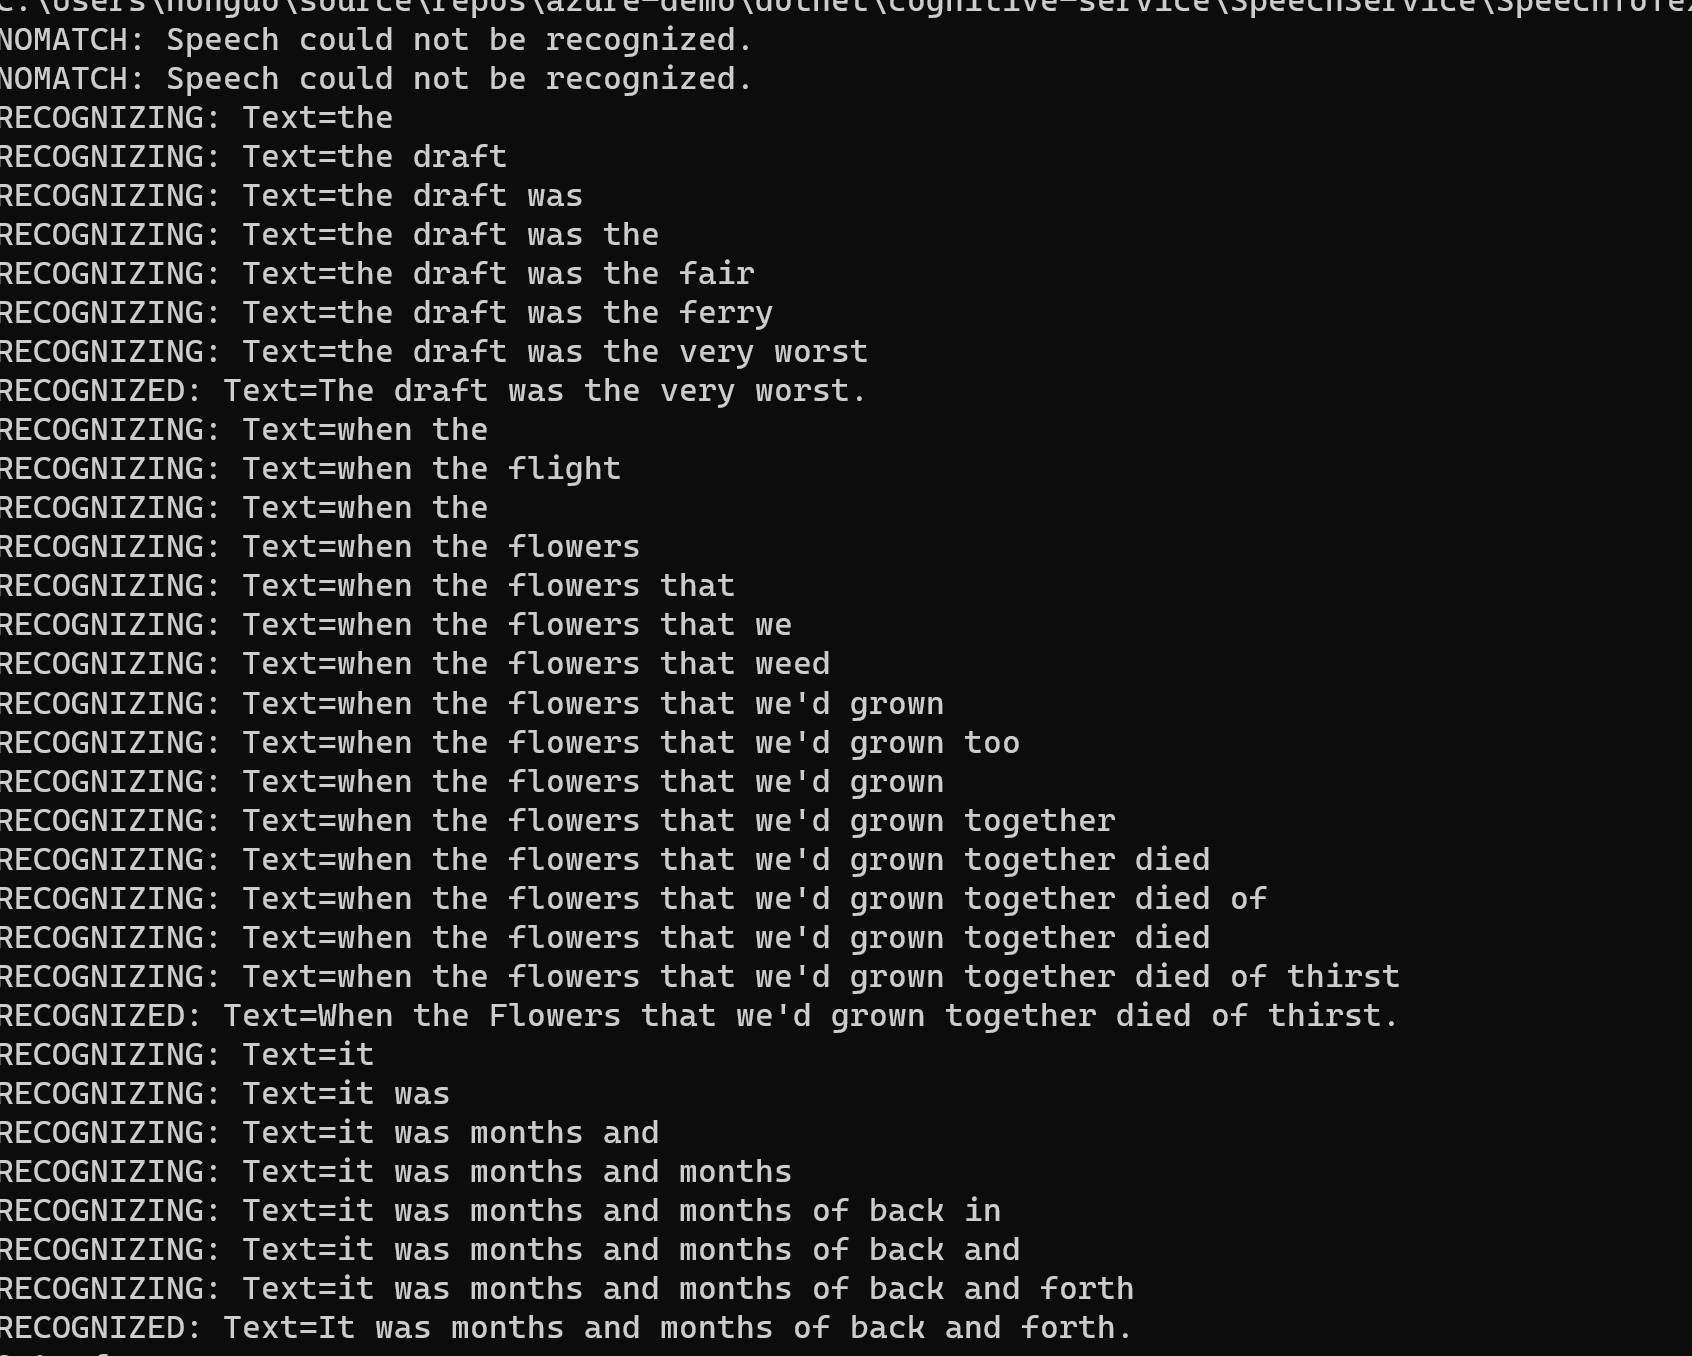
async static Task FromGStream(SpeechConfig speechConfig)
{

    var pullAudio = AudioInputStream.CreatePullStream(
        new BinaryAudioStreamReader(new BinaryReader(File.OpenRead(@".\1.flac"))),
        AudioStreamFormat.GetCompressedFormat(AudioStreamContainerFormat.FLAC)
    );

    using var audioConfig = AudioConfig.FromStreamInput(pullAudio);

    //自动语言检测
    var autoDetectSourceLanguageConfig =
        AutoDetectSourceLanguageConfig.FromLanguages(
            new string[] { "en-us", "zh-CN"}
        );

    using var recognizer = new SpeechRecognizer(speechConfig,
        autoDetectSourceLanguageConfig,
        audioConfig);

    var stopRecognition = new TaskCompletionSource<int>();
    recognizer.Recognizing += (s, e) =>
        {
            Console.WriteLine($"RECOGNIZING: Text={e.Result.Text}");
        };

    recognizer.Recognized += (s, e) =>
    {
        if (e.Result.Reason == ResultReason.RecognizedSpeech)
        {
            Console.WriteLine($"RECOGNIZED: Text={e.Result.Text}");
        }
        else if (e.Result.Reason == ResultReason.NoMatch)
        {
            Console.WriteLine($"NOMATCH: Speech could not be recognized.");
        }
    };

    recognizer.Canceled += (s, e) =>
    {
        Console.WriteLine($"CANCELED: Reason={e.Reason}");

        if (e.Reason == CancellationReason.Error)
        {
            Console.WriteLine($"CANCELED: ErrorCode={e.ErrorCode}");
            Console.WriteLine($"CANCELED: ErrorDetails={e.ErrorDetails}");
            Console.WriteLine($"CANCELED: Did you update the subscription info?");
        }

        stopRecognition.TrySetResult(0);
    };

    recognizer.SessionStopped += (s, e) =>
    {
        Console.WriteLine("\n    Session stopped event.");
        stopRecognition.TrySetResult(0);
    };


    await recognizer.StartContinuousRecognitionAsync();

    // Waits for completion. Use Task.WaitAny to keep the task rooted.
    Task.WaitAny(new[] { stopRecognition.Task });

    // make the following call at some point to stop recognition.
    await recognizer.StopContinuousRecognitionAsync();


}
随后在Main方法里调用该方法,结果如下图:
自动语言检测
我们有时候需要对声音文件进行自动语言检测,要启用这个特性,只需要配置:
using var audioConfig = AudioConfig.FromStreamInput(pullAudio);

//自动语言检测
var autoDetectSourceLanguageConfig =
    AutoDetectSourceLanguageConfig.FromLanguages(
        new string[] { "en-us", "zh-CN"}
    );

using var recognizer = new SpeechRecognizer(speechConfig,
    autoDetectSourceLanguageConfig,
    audioConfig);