Identity Server4和Asp.net Core应用交互
分类: IdentityServer4教程 ◆ 标签: #Asp.Net core基础 #认证 #授权 #OpenId Connect #OAuth2 #Identity Server ◆ 发布于: 2023-05-27 22:39:27

本节介绍如何添加一个基于用户的通过OpenId Connect交互式认证的实例。
本节介绍的实例是基于上一节实例的,因此我们需要在本节重用上节的代码,我们会在上一节代码的基础上创建一个新的MVC应用,用户会使用IdentityServer进行交互式授权访问该MVC应用。
添加UI
由于本节需要使用用户交互式认证和授权,因此我们需要对我们的IdentitySerer添加必要的UI界面。例如登录,注销,许可,错误页面等等。
IdentityServer4提供一个线程的UI,该UI库可以在这里找到Quickstart UI repo. 可以将该代码clone到本地后应用,也可以根据需要进行更改。
另外也可以直接通过模板在原有项目中添加模板:
dotnet new is4ui
一旦添加了MVC UI, 还需要启用MVC的功能,根据ASP.net Core你可以在Startup.cs的ConfigureService方法和Configure方法中启用MVC。
添加好UI之后,重启IdentityServer你就可以看到主页面了。
创建一个MVC客户端
使用如下命令创建MVC客户端
    dotnet new mvc -n MvcClient
    cd ..
    dotnet sln add .\src\MvcClient\MvcClient.csproj
注意
我们推荐使用self-host选型运行应用,这样我们可以在文件Properties\launchSettings.json中修改对应的端口,我们假定MvcClient应用的端口修改为5002
为了给MVC应用添加OpenId Connect认证,我们首先需要安装相应的Nuget包
dotnet add package Microsoft.AspNetCore.Authentication.OpenIdConnect
然后在类Startup中的ConfigureServeres中添加如下的配置
using System.IdentityModel.Tokens.Jwt;

// ...

JwtSecurityTokenHandler.DefaultMapInboundClaims = false;

services.AddAuthentication(options =>
    {
        options.DefaultScheme = "Cookies";
        options.DefaultChallengeScheme = "oidc";
    })
    .AddCookie("Cookies")
    .AddOpenIdConnect("oidc", options =>
    {
        options.Authority = "https://localhost:5001";

        options.ClientId = "mvc";
        options.ClientSecret = "secret";
        options.ResponseType = "code";

        options.SaveTokens = true;
    });
我们使用方法AddAuthentication向DI容器中添加认证服务,同时注意我们在本地使用cookie认证schema, 但是同时在cookie里设置了ChallengeSchema到ODIC, 这样当为认证的用户访问的时候就会将该用户导向到IdentityServer4的服务了。 AddOpenIdConnect方法用于定义我们的IdentityServer4的地址。
然后我们使用如下的代码保证对于MvcClient的每个请求都需要认证 Startup 中的 Configure
app.UseStaticFiles();

app.UseRouting();
app.UseAuthentication();
app.UseAuthorization();

app.UseEndpoints(endpoints =>
{
    endpoints.MapDefaultControllerRoute()
        .RequireAuthorization();
});
注意
需要注意的是RequireAuthorization方法禁止了整个应用的匿名登录, 当然也可以使用特性[Authorize]来启用认证
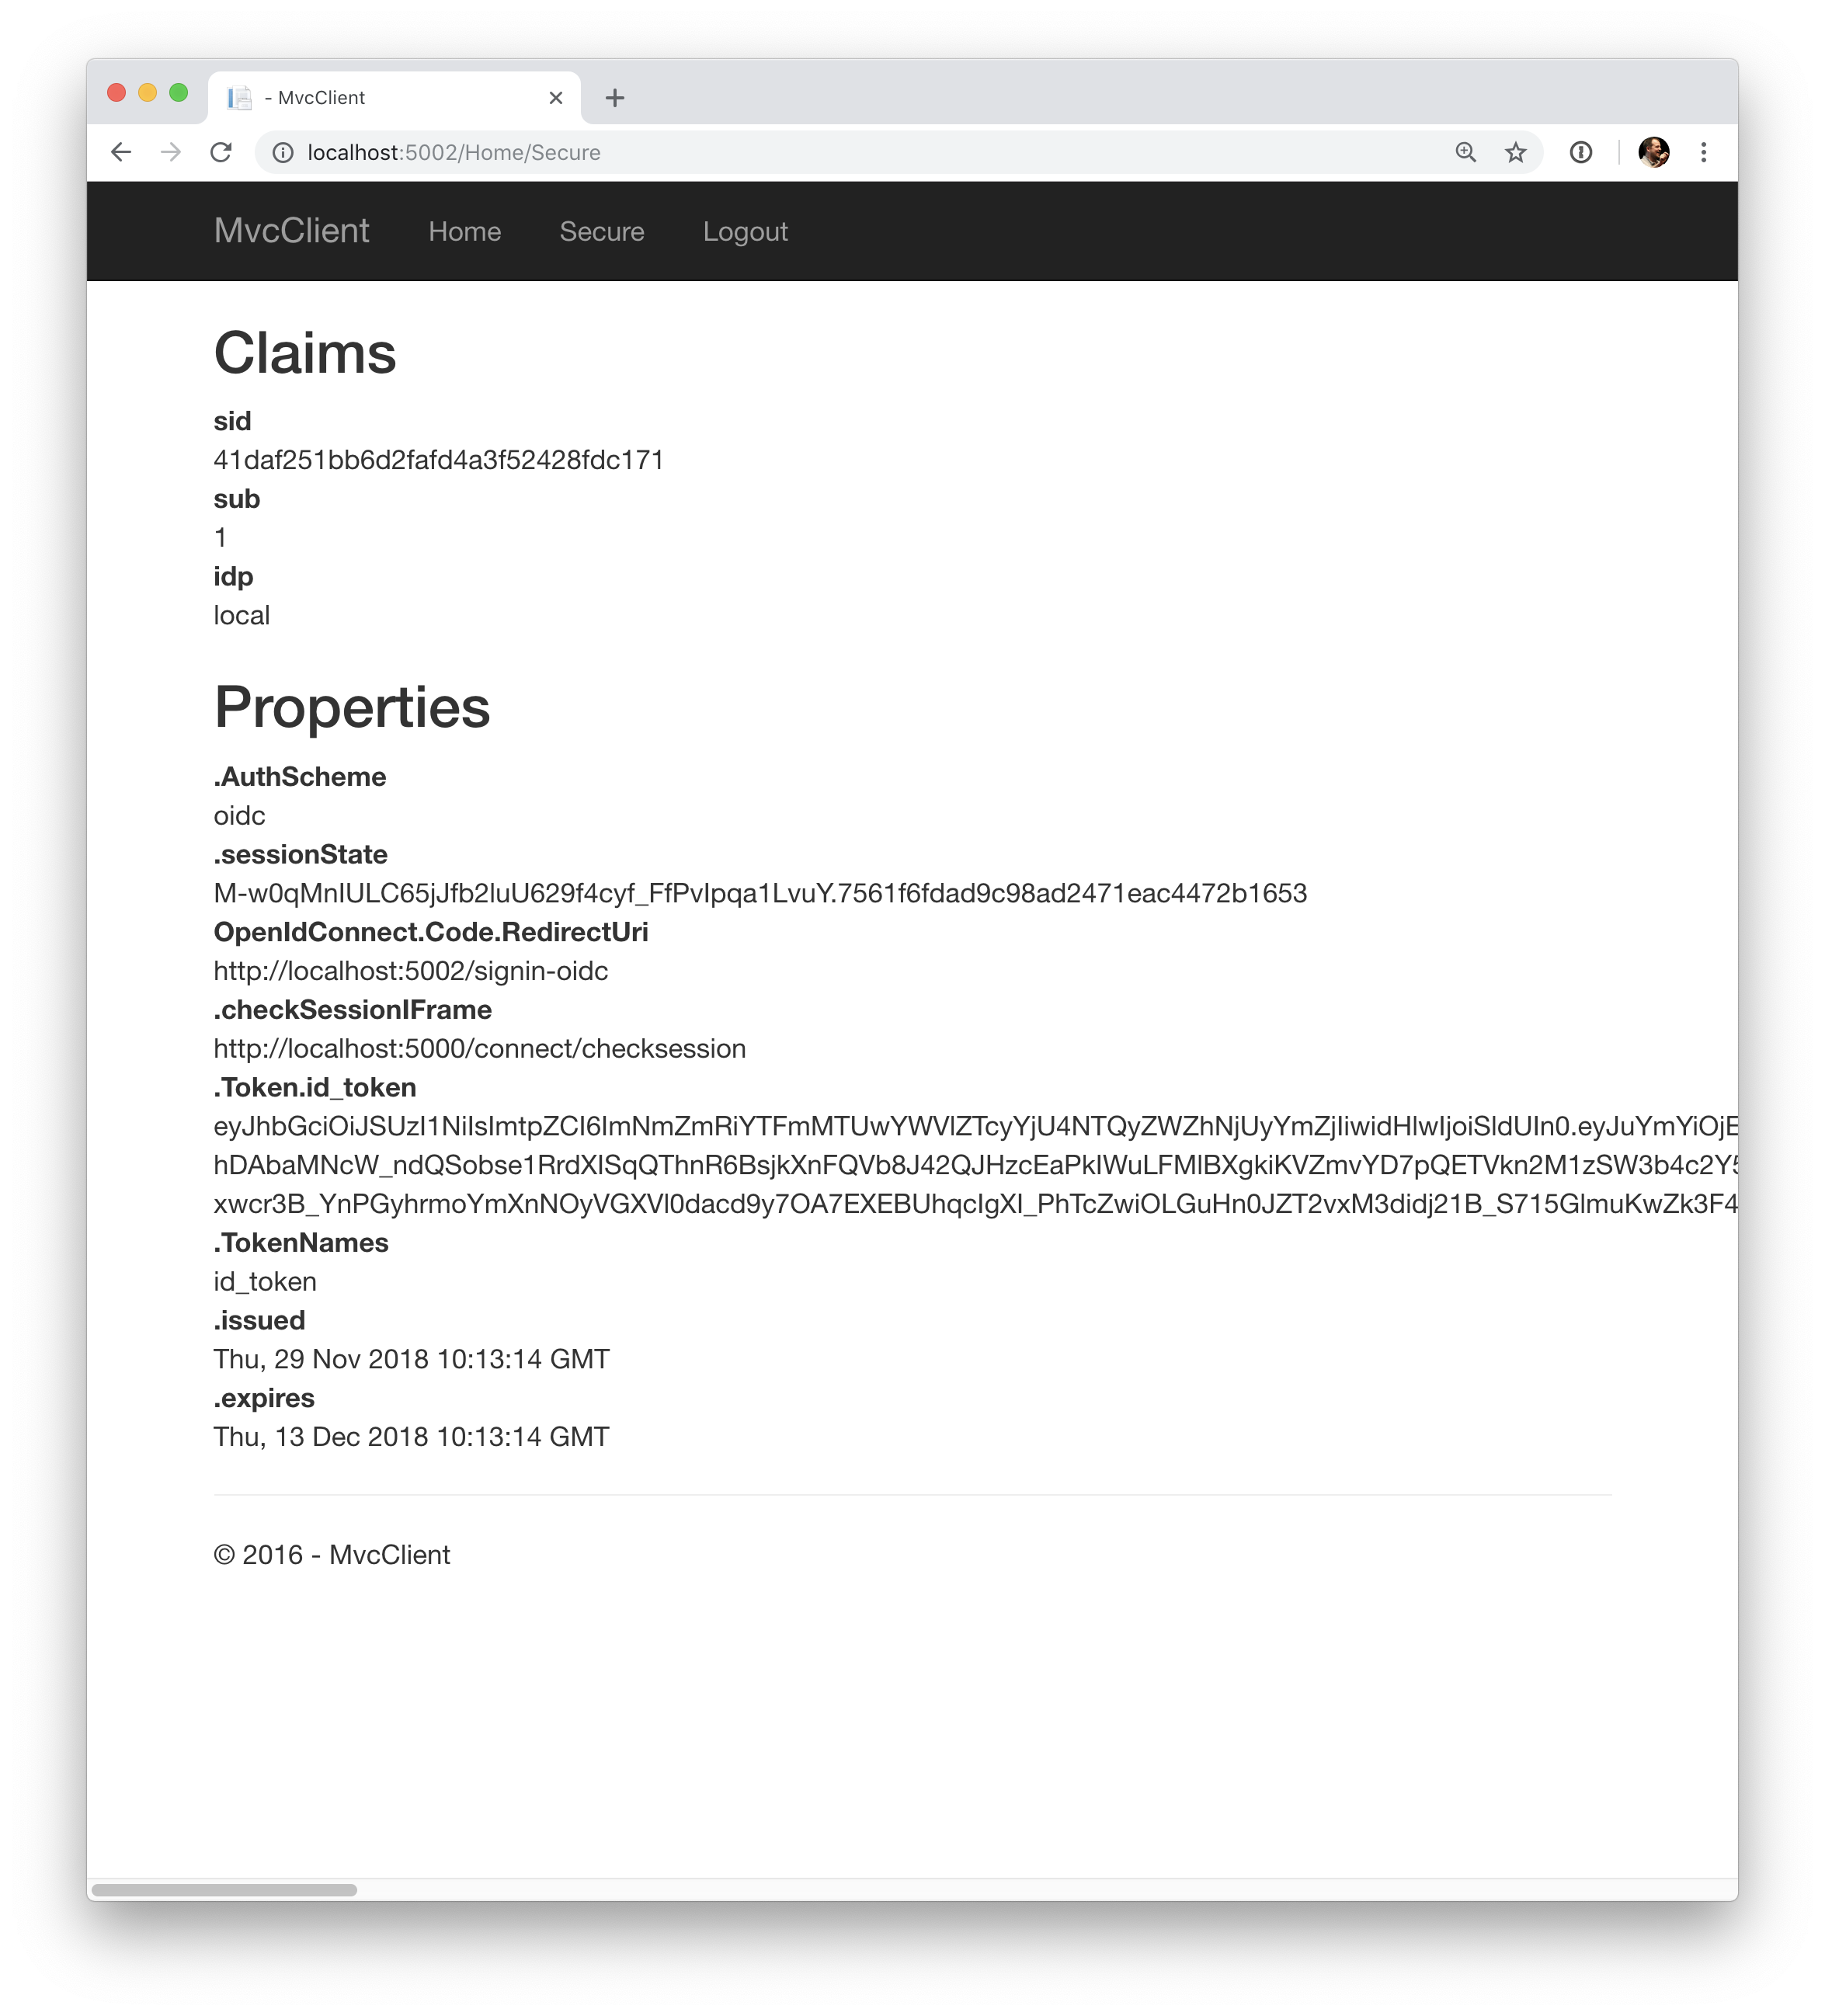
修改home视图用于显示用户的Claim以及cookie的部分属性
@using Microsoft.AspNetCore.Authentication

<h2>Claims</h2>

<dl>
    @foreach (var claim in User.Claims)
    {
        <dt>@claim.Type</dt>
        <dd>@claim.Value</dd>
    }
</dl>

<h2>Properties</h2>

<dl>
    @foreach (var prop in (await Context.AuthenticateAsync()).Properties.Items)
    {
        <dt>@prop.Key</dt>
        <dd>@prop.Value</dd>
    }
</dl>
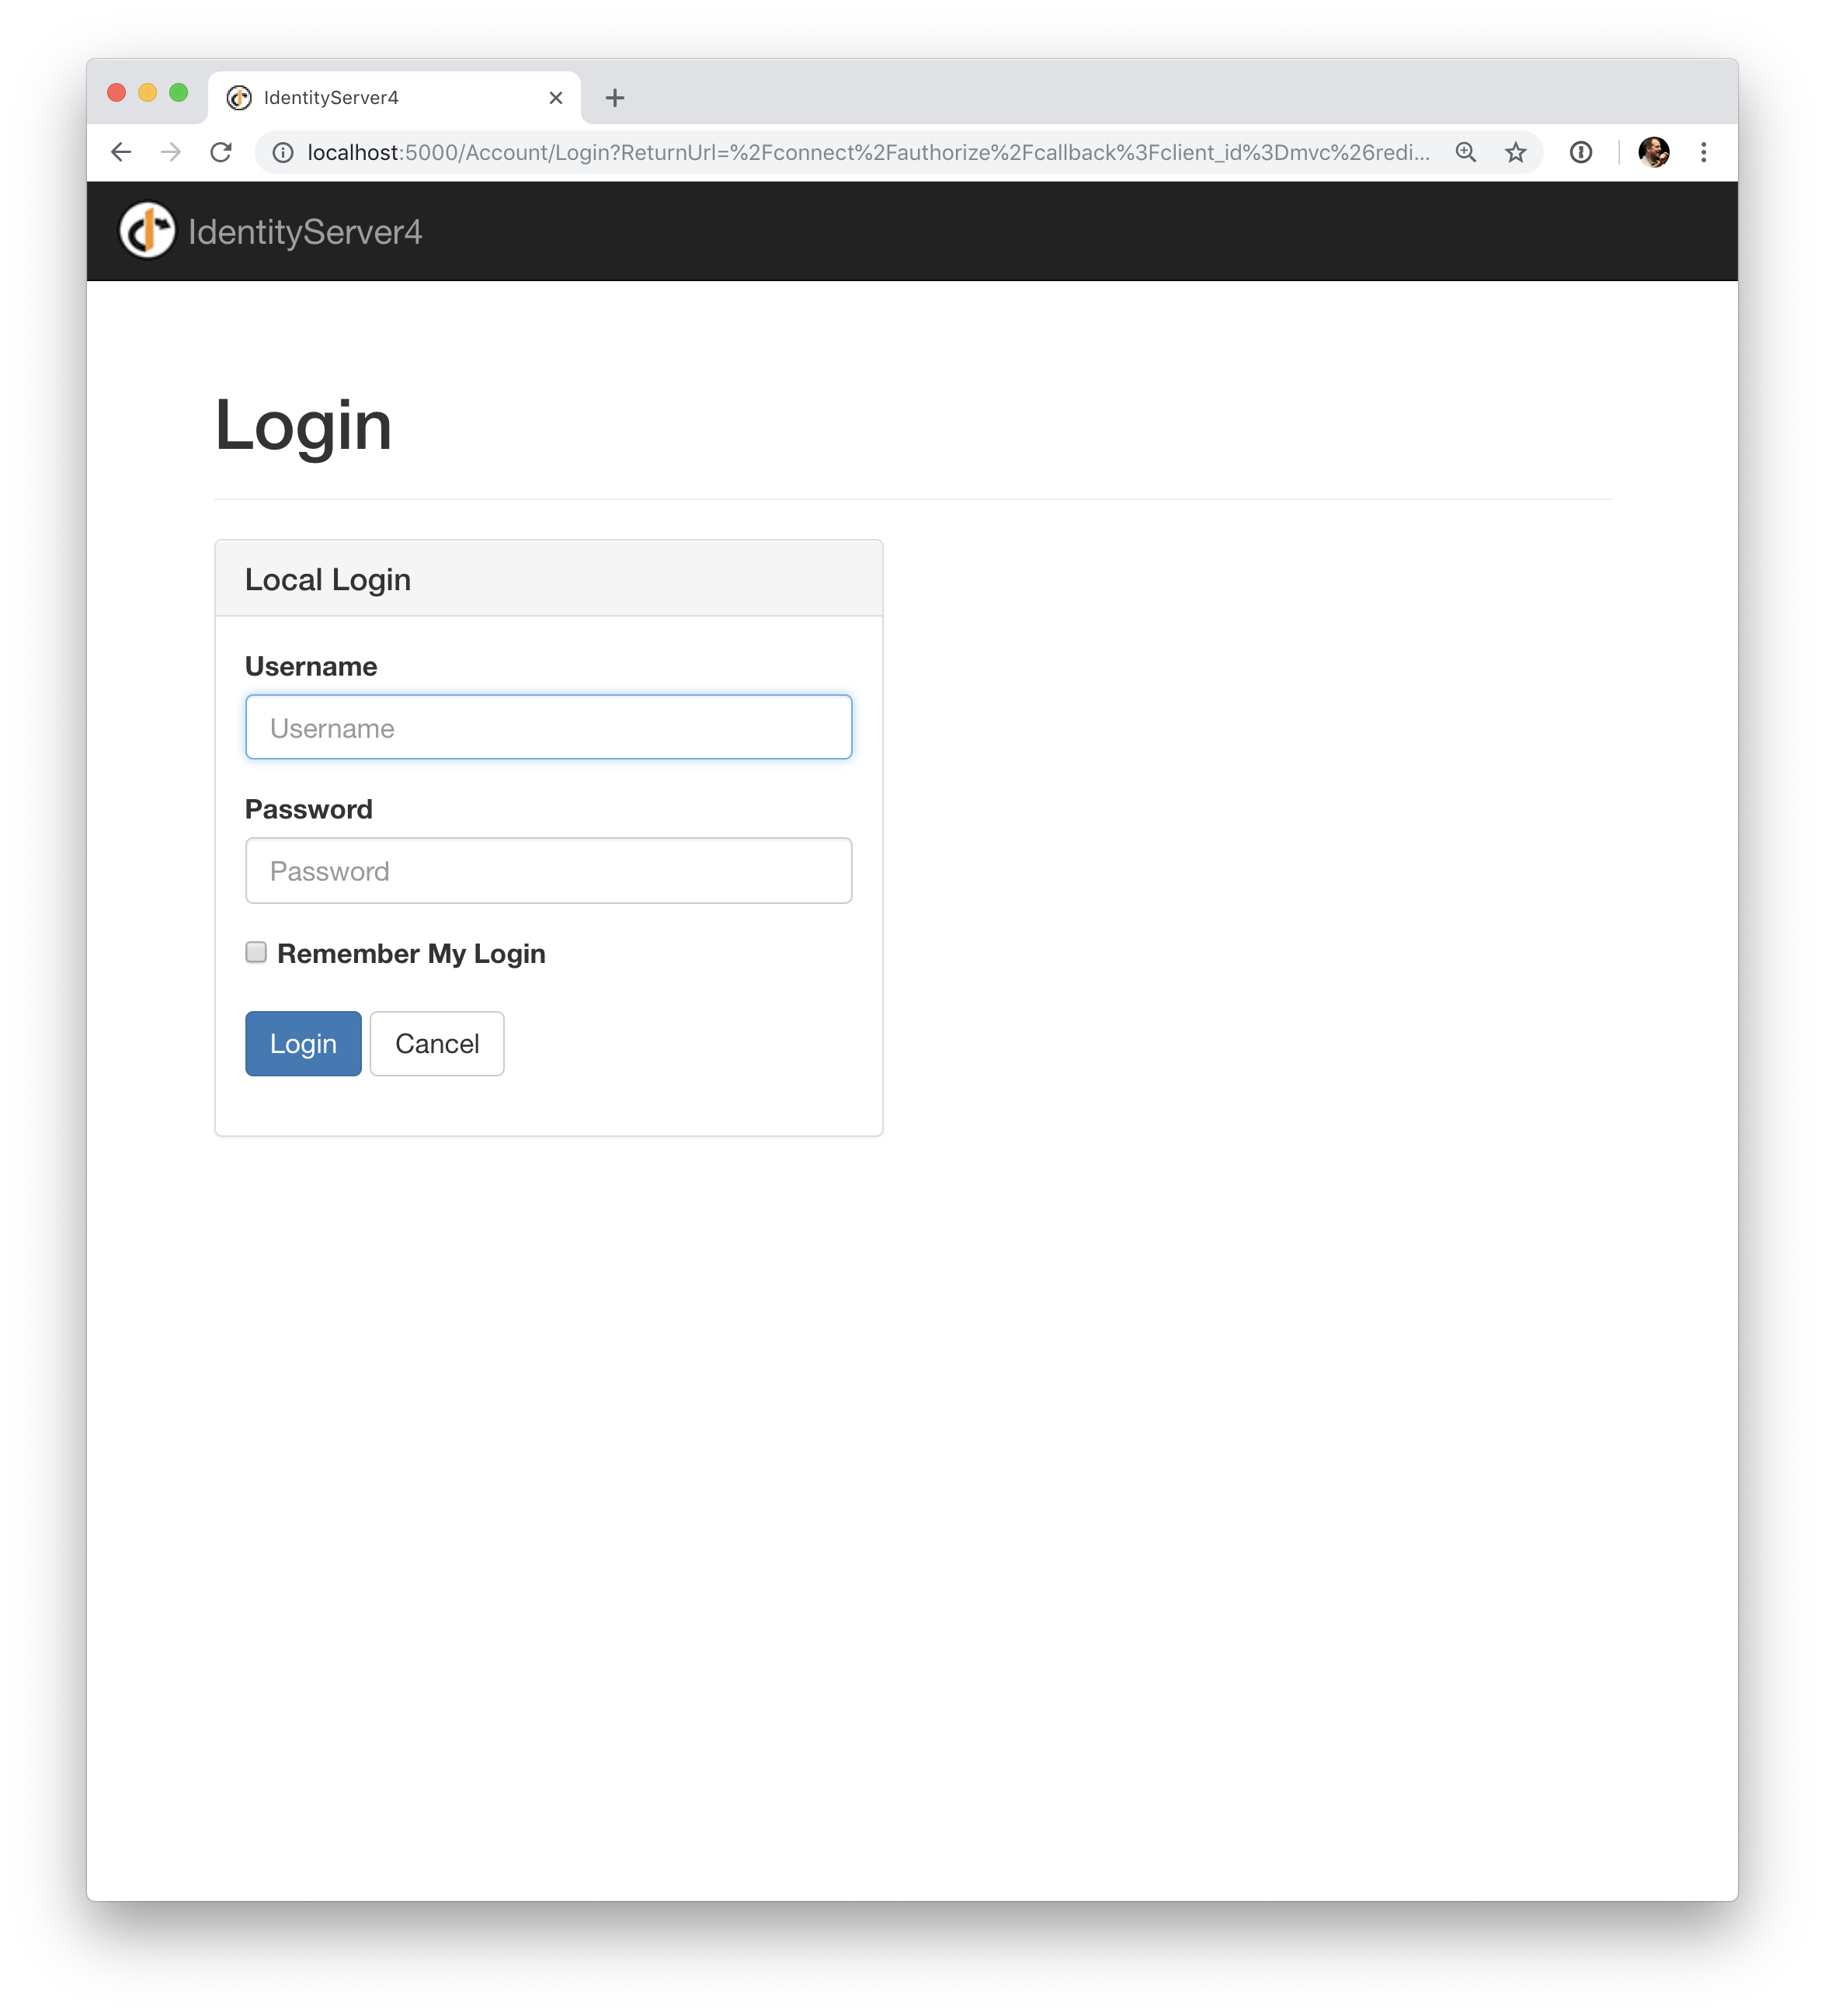
启动应用之后,用浏览器访问该应用,会导向IdentityServer4的登录界面。
向IdentityServer4应用添加Scope
OpenId Connect和QAuth2.0类似也使用Scope的概念,Scope代表你向保护的资源,但是和QAuth2.0不同的是,OpenId Connect中的Scope不代表API, 代表的是标识数据,例如User id, 或者email等等。
下述代码添加标准的openid(Subject id)和Profile(first name, last name 等等), 要启用scope只需要使用IdentityResource属性
public static IEnumerable<IdentityResource> IdentityResources =>
    new List<IdentityResource>
    {
        new IdentityResources.OpenId(),
        new IdentityResources.Profile(),
    };
在IdentityServer项目中的startup.cs中注册标识资源
var builder = services.AddIdentityServer()
    .AddInMemoryIdentityResources(Config.IdentityResources)
    .AddInMemoryApiScopes(Config.ApiScopes)
    .AddInMemoryClients(Config.Clients);
添加测试用户
IdentityServer4的UI包中自带了保存在内存中的用户数据库,如果要启用它,请使用扩展方法AddTestUsers
var builder = services.AddIdentityServer()
    .AddInMemoryIdentityResources(Config.IdentityResources)
    .AddInMemoryApiScopes(Config.ApiScopes)
    .AddInMemoryClients(Config.Clients)
    .AddTestUsers(TestUsers.Users);
通过查看TestUsers的源代码可以看到用户alice和用户bob 被定义,同时登录密码和用户名是一致的,也即用户alice的登录密码就是alice,bob也是。
将MvcClient客户端应用添加到IdentityServer的配置中
最后一步是需要将我们新创建的MvcClient添加到IdentityServer的配置中去,这个和我们前一节是类似的。
public static IEnumerable<Client> Clients =>
    new List<Client>
    {
        // machine to machine client (from quickstart 1)
        new Client
        {
            ClientId = "client",
            ClientSecrets = { new Secret("secret".Sha256()) },

            AllowedGrantTypes = GrantTypes.ClientCredentials,
            // scopes that client has access to
            AllowedScopes = { "api1" }
        },
        // interactive ASP.NET Core MVC client
        new Client
        {
            ClientId = "mvc",
            ClientSecrets = { new Secret("secret".Sha256()) },

            AllowedGrantTypes = GrantTypes.Code,

            // where to redirect to after login
            RedirectUris = { "https://localhost:5002/signin-oidc" },

            // where to redirect to after logout
            PostLogoutRedirectUris = { "https://localhost:5002/signout-callback-oidc" },

            AllowedScopes = new List<string>
            {
                IdentityServerConstants.StandardScopes.OpenId,
                IdentityServerConstants.StandardScopes.Profile
            }
        }
    };
需要注意的是我们需要更改MvcClient运行的端口。
测试MvcClient 客户端
启动MvcClient之后,然后再启动IdentityServer, 使用浏览器访问MvcClient, 会导向IdentityServer的登录界面,如下图:
登录之后,IdentityServer会再次导向Mvc的主页,如下图: