创建一个基于Windows Service的产线设备应用
分类: Azure物联网 ◆ 标签: #Azure #IoT Hub # #入门 #指南 ◆ 发布于: 2023-06-13 22:35:51

我们之前的两章仔细的介绍了在设备应用中如何管理和Azure IoT Hub之间的连接。本章我们设计自己的设备应用, 该应用App运行在基于Windows的平台上,并且以Windows Service形式运行,当设备重启之后会自动重启该服务,设备的日志和Windows的事件日志集成。
该应用主要的功能还是从之前文章介绍的代码框架:
- 根据返回的异常判断是否重新创建设备实例。
- 监控设备连接的状态变化,根据状态的不同而决定需要重试还是直接放弃,或者重新初始化设备实例重连。
注意
本节的实例代码你可以在这里找到:https://github.com/hylinux/azure-iot-hub-examples/tree/main/IoTDeviceOnWindowsService
本节的代码改动并不是很大,添加的代码时为了将应用转为一个Windows Service。
创建应用,并添加必要的软件包:
dotnet new worker -o IoTDeviceOnWindowsService
cd IoTDeviceOnWindowsService
dotnet add package Microsoft.Extensions.Hosting.WindowsServices
dotnet add package Microsoft.Azure.Devices.Client
要创建一个基于Windows Service的应用,有如下几个必要的条件:
- 必须使用
worker的模板 - 必须引用包:
Microsoft.Extensions.Hosting.WindowsServices
创建项目之后,使用Visual Studio Code打开该项目,首先添加我们前一章已经介绍过的辅助文件以及自动逸重试规则的类:
ExceptionHelper.csCustomRetryPolicy.cs
同时创建一个类DeviceService.cs,它的初始内容如下:
namespace IoTDeviceOnWindowsService;

public class DeviceService : BackgroundService
{
    private readonly ILogger<DeviceService> _logger;

    public DeviceService(ILogger<DeviceService> logger)
    {
        _logger = logger;
    }

    protected override async Task ExecuteAsync(CancellationToken stoppingToken)
    {
        while (!stoppingToken.IsCancellationRequested)
        {
            _logger.LogInformation("Worker running at: {time}", DateTimeOffset.Now);
            await Task.Delay(1000, stoppingToken);
        }
    }
}
我们将前一章中介绍的DeviceReconnectionSample的内容,修改置于文件DeviceService.cs, 该文件的内容可以参考:https://github.com/hylinux/azure-iot-hub-examples/blob/main/IoTDeviceOnWindowsService/DeviceService.cs
主要的要点其实是针对CancellationTokenSource的,其他的代码之前已经介绍过了。
请注意代码:
s_appCancellation = CancellationTokenSource.CreateLinkedTokenSource(stoppingToken);
将Host中已经创建的CancellationTokenSource和DeviceService 中的CancellationTokenSource连接起来,这样当Host因为某些原因取消,会自动引发DeviceService中的线程也会跟着Cancel。
注意
代码部分就不想详细展开讲了,可以参考本节中贴出的代码,自行参考就好了。
为了将项目编译为Windows Service,我们需要更改一下项目文件,打开项目文件:IoTDeviceOnWindowsService.csproj:
<Project Sdk="Microsoft.NET.Sdk.Worker">

  <PropertyGroup>
    <TargetFramework>net7.0-windows</TargetFramework>
    <Nullable>enable</Nullable>
    <ImplicitUsings>enable</ImplicitUsings>
    <RootNamespace>IoTDeviceOnWindowsService</RootNamespace>
    <OutputType>exe</OutputType>
    <PublishSingleFile Condition="'$(Configuration)' == 'Release'">true</PublishSingleFile>
    <RuntimeIdentifier>win-x64</RuntimeIdentifier>
    <PlatformTarget>x64</PlatformTarget>
    <UserSecretsId>dotnet-IoTDeviceOnWindowsService-11b29788-535c-4758-8ee0-d2898cc9ba46</UserSecretsId>
  </PropertyGroup>

  <ItemGroup>
    <PackageReference Include="Microsoft.Azure.Devices.Client" Version="1.41.3" />
    <PackageReference Include="Microsoft.Extensions.Hosting" Version="7.0.0" />
    <PackageReference Include="Microsoft.Extensions.Hosting.WindowsServices" Version="7.0.0" />
  </ItemGroup>
</Project>
尤其重要的是:
   <RootNamespace>IoTDeviceOnWindowsService</RootNamespace>
    <OutputType>exe</OutputType>
    <PublishSingleFile Condition="'$(Configuration)' == 'Release'">true</PublishSingleFile>
    <RuntimeIdentifier>win-x64</RuntimeIdentifier>
    <PlatformTarget>x64</PlatformTarget>
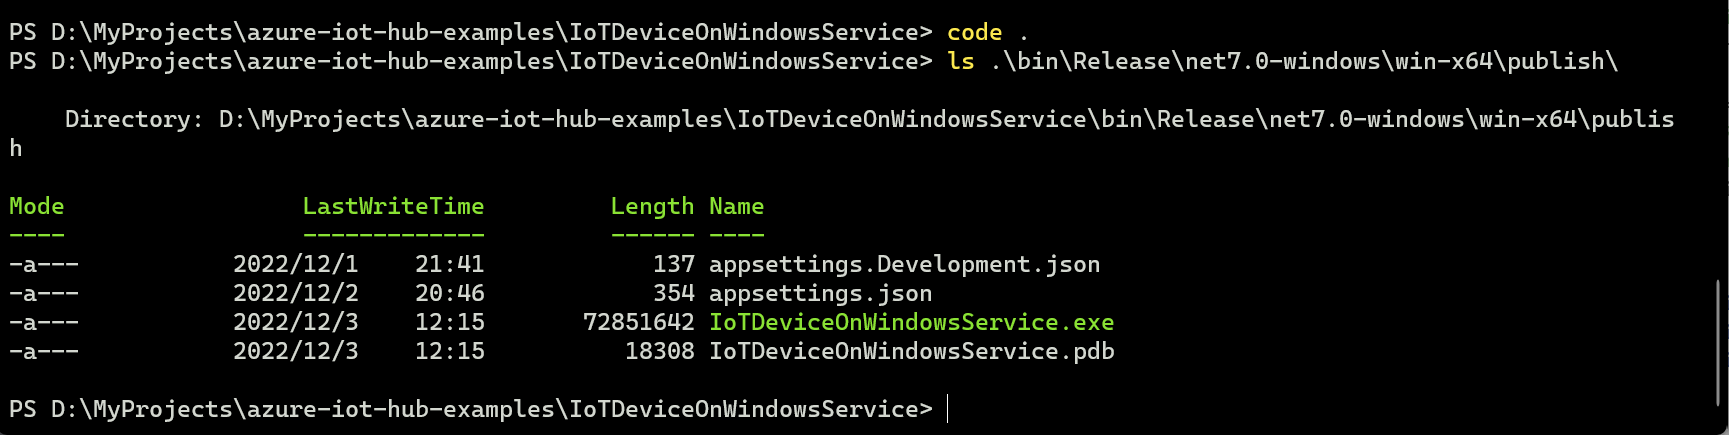
编码文章以及配置好项目文件之后,可以使用如下的命令发布:
dotnet publish -c Relase
默认情况下会编译一个exe文件在项目目录下的:.\bin\Release\net7.0-windows\win-x64\publish\
需要注意的是项目中需要添加三个环境变量:
Device:ConnectionString:Primary: 设备的主要连接字符串Device:ConnectionString:Secondary: 设备的次要连接字符串Device:Connection:TransportType: 设备的连接协议。
如果是在开发过程,建议使用Security Manager来管理这些连接字符串(而不要用配置文件), 如果是在产线,那么使用环境变量来设置。
注意
如果要使用Windows Service运行设备应用,那么一定要在系统环境变量中添加这些变量,否则Windows Service无法读取这些变量。
使用Security Manager管理机密,切换到项目目录下:
dotnet user-secrets init
dotnet user-secrets set "Device:ConnectionString:Primary" "主要连接字符串"
dotnet user-secrets set "Device:ConnectionString:Secondary" "次要连接字符串"
dotnet user-secrets set "Device:Connection:TransportType" "mqtt/amqp/etc"
$env:DOTNET_ENVIRONMENT = "Development"
开发过程中一定要记得设置环境变量DOTNET_ENVIRONMENT = "Development", Security Manager只能在开发模式中可用。
设置系统环境变量时,要注意将环境变量中的分隔符:更改为双下划线__, 例如:Device:ConnectionString:Primary更改为:Device__ConnectionString__Primary
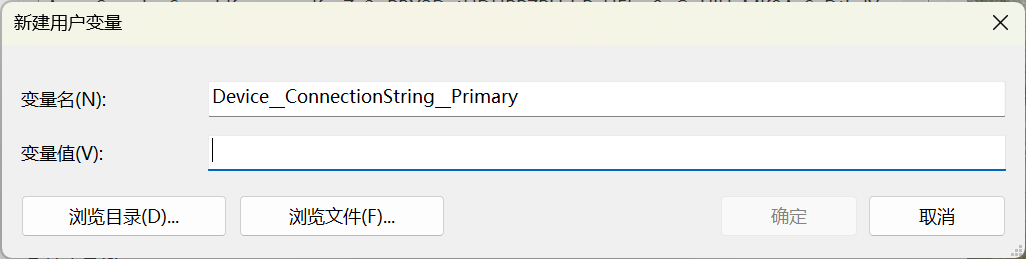
注意
一定是要新建一个系统环境变量,而非用户变量.
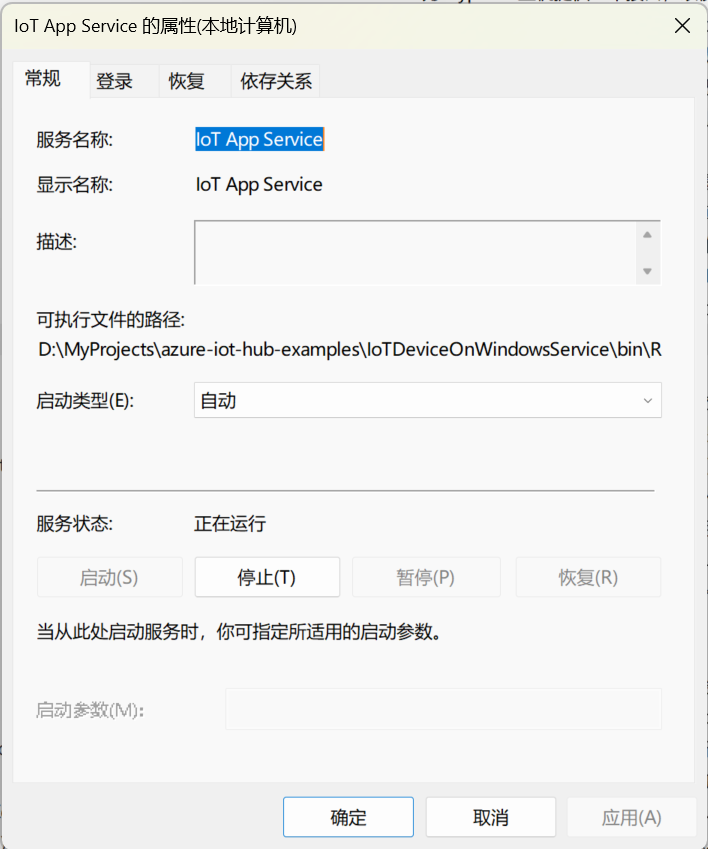
使用下述的命令安装一个Windows Service:(必须在管理员终端上运行如下的命令)
sc.exe create "IoT App Service" binpath="D:\MyProjects\azure-iot-hub-examples\IoTDeviceOnWindowsService\bin\Release\net7.0-windows\win-x64\publish\IoTDeviceOnWindowsService.exe"
然后启用Windows服务,可以看到:
使用命令:
sc.exe stop "IoT App Service"
sc.exe delete "IoT App Service"
停止和删除命令。
你也可以使用Windows的事件管理器,查看正在运行的服务:
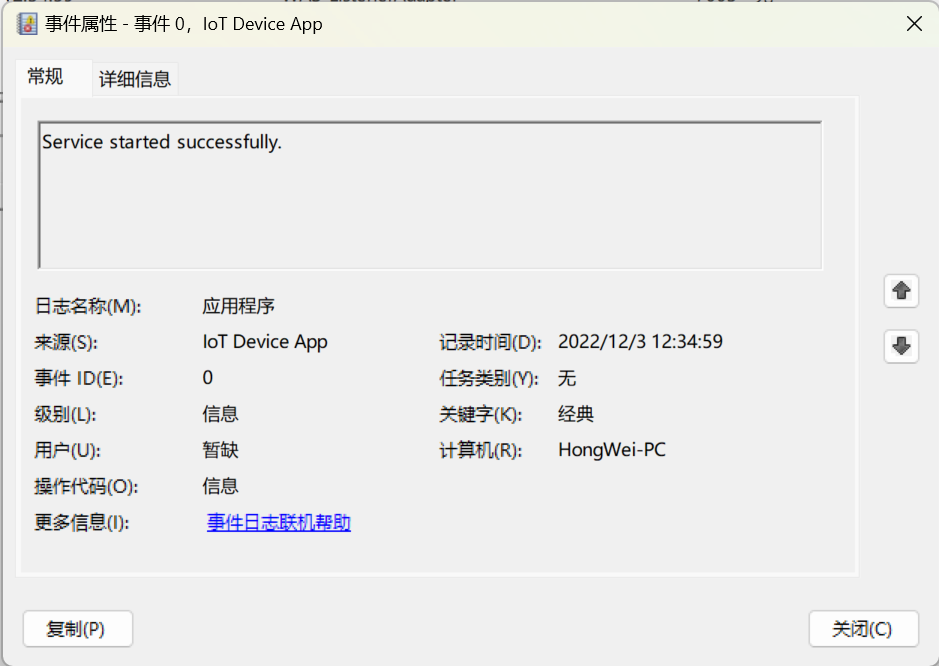
至此我们就创建了一个完整的,真正可以用于产线环境的设备应用App。