使用SAS Key链接Azure IoT Hub并发送遥测数据
分类: Azure物联网 ◆ 标签: #Azure #IoT Hub # ◆ 发布于: 2023-06-13 20:33:45

目前Azure IoT Hub支持三种方式认证并使得设备可以通过Device SDK连接,一种是SAS Key,一种是X.509签发证书, 还可以使用自签发证书。我们本节先来过一下如何使用SAS Key。
SAS Key
SAS Key即symmetric shared access key, 可以通过如下方式得到设备的SAS key。
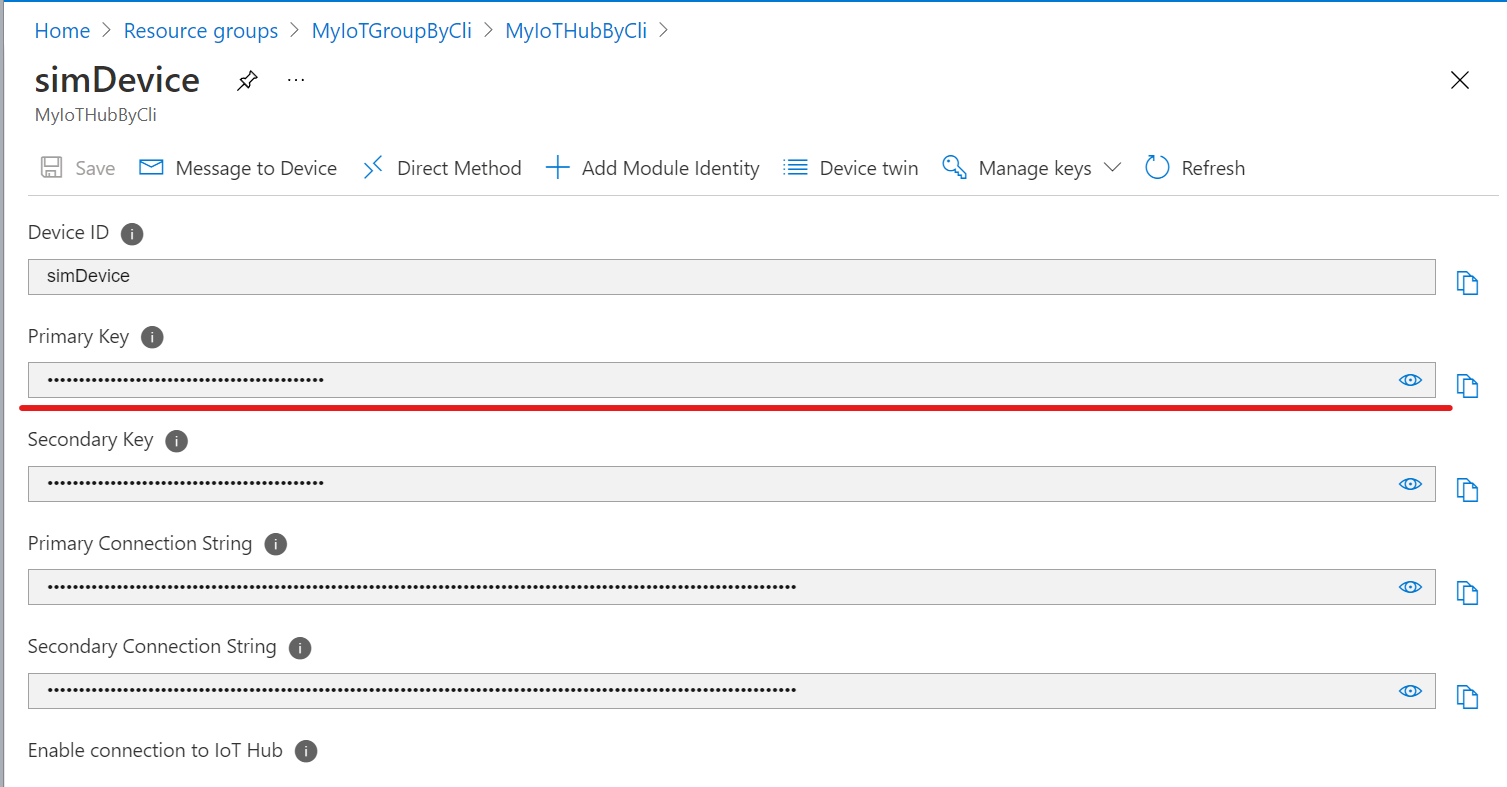
通过Azure Portal
登录到Azure Portal之后,从IoT hub左侧菜单的Device菜单中找到需要连接的设备,点击该设备之后,即可在如下的界面上找到该key, 如下图:
通过Azure CLI IoT 工具
也可以快速的通过Azure Cli IoT扩展工具找到SAS key以及连接字符串。
az iot hub device-identity connection-string show --device-id simDevice --hub-name MyIoThubByCli
该语句返回的结果就是我们需要的连接字符串,那到该以SAS Key为基础的连接字符串之后,我们可以使用如下的代码来连接Azure IoT Hub以及向Azure IoT Hub发送遥测数据。
注意
代码是基于.Net 6的
使用.Net SDK连接到Azure IoT Hub
使用如下的命令创建一个项目,并引入需要的SDK包:
dotnet new console -o simDevice
cd simDevice
dotnet add package Microsoft.Azure.Devices.Client
code .
打开VS code或者其他编辑器之后,在根目录下添加一个文件GlobalUsing.cs, 打开该文件,添加如下的引用:
global using Microsoft.Azure.Devices.Client;
global using System.Text.Json;
global using System.Text;
然后打开文件Program.cs, 以如下的内容进行替换:
Console.WriteLine("使用SAS Key连接Azure IoT Hub实例");

string s_connectionString = "<你的连接字符串>";

//验证连接字符串是否是正确的
ValidateConnectionString(args);

DeviceClient s_deviceClient = DeviceClient.CreateFromConnectionString(s_connectionString);

Console.WriteLine("请同时按 Control - C 退出应用");

using var cts = new CancellationTokenSource();
Console.CancelKeyPress += (sender, eventArgs) =>
{
    eventArgs.Cancel = true;
    cts.Cancel();
    Console.WriteLine("退出程序......");
};

await SendDeviceToCloudMessageAsync(cts.Token);

await s_deviceClient.CloseAsync();

s_deviceClient.Dispose();
Console.WriteLine("模拟设备退出!");

async Task SendDeviceToCloudMessageAsync(CancellationToken ct)
{
    //初始化遥测的配置
    double minTemperature = 20;
    double minHumidity = 60;
    var rand = new Random();

    while ( !ct.IsCancellationRequested )
    {
        double currentTemperature = minTemperature + rand.NextDouble() * 15;
        double currentHumidity = minHumidity + rand.NextDouble() * 20;

        //创建Json编码的消息
        string messageBody = JsonSerializer.Serialize(
            new {
                temperature = currentTemperature,
                humidity = currentHumidity,
            }
        );

        using var message = new Message(Encoding.ASCII.GetBytes(messageBody))
        {
            ContentType = "application/json",
            ContentEncoding = "utf-8",
        };

        message.Properties.Add("temperatureAlert", (currentTemperature> 30 )? "true":"false");

        await s_deviceClient.SendEventAsync(message);
        Console.WriteLine($"{DateTime.Now} > 发送消息:{messageBody}");

        await Task.Delay(1000);

    }
}

void ValidateConnectionString(string[] appArgs)
{
    if ( appArgs.Any() )
    {
        try
        {
            var cs = IotHubConnectionStringBuilder.Create(appArgs[0]);
            s_connectionString = cs.ToString();

        } catch ( Exception )
        {
            Console.WriteLine($"错误:无法识别连接字符串参数 `{appArgs[0]}");
            Environment.Exit(-1);
        }

    }
    else
    {
        try
        {
            _ = IotHubConnectionStringBuilder.Create(s_connectionString);
        } catch(Exception )
        {
            Console.WriteLine("这个Demo需要使用连接字符串连接到Azure IoT Hub");
            Environment.Exit(-1);
        }
    }
}
保存该文件后,在控制台上运行:
D:\MyProjects\azure-demo\IoT\simDevice>dotnet run

有可用的工作负载更新。有关详细信息,请运行“dotnet 工作负载列表”。
使用SAS Key连接Azure IoT Hub实例
请同时按 Control - C 退出应用
2021/11/14 17:35:50 > 发送消息:{"temperature":23.85318765802648,"humidity":63.12340128488558}
2021/11/14 17:35:51 > 发送消息:{"temperature":31.929952072351597,"humidity":70.19728042744205}
2021/11/14 17:35:52 > 发送消息:{"temperature":20.56479843093171,"humidity":69.6153422460884}
2021/11/14 17:35:53 > 发送消息:{"temperature":28.85470346284923,"humidity":76.65091197576487}
2021/11/14 17:35:54 > 发送消息:{"temperature":26.068974722377042,"humidity":66.05587035899377}
2021/11/14 17:35:55 > 发送消息:{"temperature":23.14044452409368,"humidity":63.41421284555572}
2021/11/14 17:35:56 > 发送消息:{"temperature":21.978161216427136,"humidity":79.28946148804755}
2021/11/14 17:35:57 > 发送消息:{"temperature":32.55419002401112,"humidity":72.1950165652001}
2021/11/14 17:35:58 > 发送消息:{"temperature":22.45100814217044,"humidity":78.34276294125289}
2021/11/14 17:35:59 > 发送消息:{"temperature":24.367319834394973,"humidity":63.89482453706013}
2021/11/14 17:36:00 > 发送消息:{"temperature":26.43406352740187,"humidity":77.94287799049701}
退出程序......
模拟设备退出!

D:\MyProjects\azure-demo\IoT\simDevice>
即可以连接到Azure IoT Hub并向其发送遥测数据,这里需要注意如何构成遥测数据,如何进行发送,请检查相关的代码。